Showing posts with label Needle Painting. Show all posts

Tuesday, April 24, 2018

Knife Sheath - The Embroidering Part 1

 The first order of business is to outline all of the parts that are going to have silk shading. This involves a lot of flipping the frame over to make sure I'm on the lines, but it means I can ignore the back for the actual shading part.
In this picture to the right you can see that I chose the colors for the flowers to match the original piece without taking into account that the background purple is very different. I'll be making some adjustments when I move onto the shading. But in person these lines show up plenty to give me guidance.

Here you can see the back of the piece and how I tacked the linen with the pattern on it to the back of the silk. There's actually another piece of linen in between, because the linen was so thin. You can also see that in the end I changed the pattern at the point of the sheath. I was having a hard time fitting all the motifs, so I dropped the tulips from the design. I'll need to decide on something small to put there later.

Once everything was outlined it was time to start my favorite kind of embroidery - silk shading! I used a few different similarly sized silks (primarily Splendor, though) because that's what I had in the colors I needed. I closely followed the original coloring, but I think either the threads I'm using are slightly finer, or the images are larger. It's difficult to know scale from the pictures that are available, unfortunately.


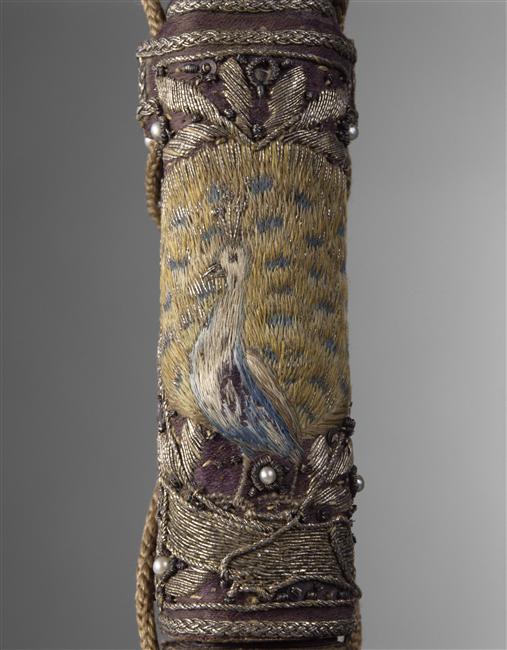
Here the left flower (minus stem) and laurel leaves are finished, and the peacock is well on his way.
I was originally going to put more shading into the laurel leaves, but people seem to like them a lot as is, so I've decided not to mess with success in this instance.

Next I'll be finishing the peacock and the right flower, before moving on to birds and stems.

Monday, April 23, 2018

Knife Sheath - The Planning


When my good friend Elaina was given her write for the Laurel, I realized that I was pretty Booked Out. I still definitely wanted to make something to celebrate her accomplishments, though. I figured she would be very supportive of me using her as an excuse to start my next real A&S project. And so!

For catalogue information, see 1962-58-11-a,b.
https://collection.cooperhewitt.org/objects/18705973/
I'd been looking at the concept of Wedding Knives for some time. Pretty embroidery and sharp objects all at the same time? Sign me up! It was an Elizabethan era tradition to give a newly married couple (or seemingly, just the new wife) a pair of table knives in a fancy case. Also during this period people had cutlery cases that were similarly decorative.
Cutlery from Queen Elizabeth

British Museum


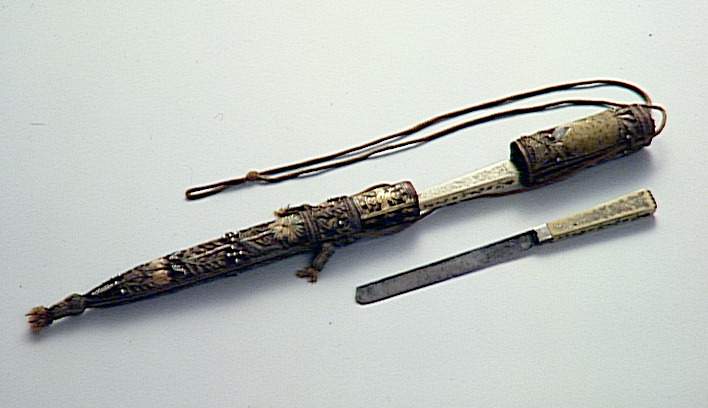
Elaina had decreed that she wanted her vigil to be based on a 17th century Italian wedding reception. It just so happened that while I mostly have evidence of the English doing this particular tradition, I also have one knife sheath that is from Venice. And it also just so happened that is was my favorite.
https://www.photo.rmn.fr/archive/99-016973-2C6NU0X7YT91.html
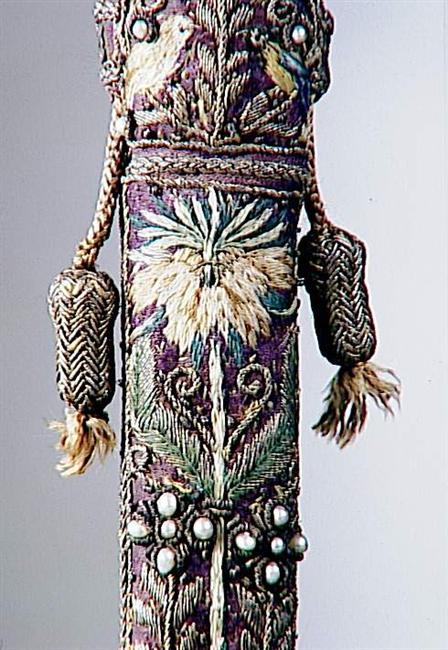
Just look at the gorgeous silk shading and gold work throughout. It's like it was made for me to make.
The pictures don't have closeups of every part of the sheath, so I've done some guesswork and some adjustments, but I tried to stay true to the original.
One of the motifs on the cover is a pelican in its piety (which I'll definitely have to remember for a future pelican) so I've replaced that with a laurel wreath.


Now, the hardest part of this for me was how to go about getting a sheath to cover. And knives. 
I decided for this timeline to cheat on those particular aspects, and instead create something that might get some more day to day use. I took a large wooden needlecase and used wood epoxy to expand it into a sheath shape, and then used that as the base for the embroidery. 
 To the right you can see the original needlecase, the expanded sheath, as well as the pattern I created. The molded sheath was far from symmetrical, so I draped some cheap cotton over it to make sure everything would fit ok. (Here's hoping that actually works in the end...)

The next step was to get the actual pattern. I sketched out the base pattern without using the weird shapes made from my drape first (on the right) and then I transferred that to the correct shape. I the traced it all onto some thin linen.
And then, because that linen would be backing the silk, I flipped the linen over and traced again, in order to get the design facing the right way. Now, with the linen basted to the silk, I could use the lines on the linen to determine my stitches, and hopefully never have to mar the silk at all. Unfortunately I did the final basting backwards and things are facing the other way anyway, but oh well!
All in all, I think I drew this pattern 5 times, though. So glad it's small.


Tuesday, July 12, 2016

Vigil Book for Matthias

It's been a busy summer for me!
Once again I was asked to create a vigil book cover - this time for a friend who was getting his Knighthood!

The original design was based on the motifs that were going on a new tunic, also for the occasion. Those motifs were in turn based on the sorts of designs you would often find in German brick stitch as well as Austrian roof tiles.
Image from A Stitch Out of Time
The belt was an obvious choice, this being a knighting and all. No part of me wanted to try to embroider a unicorn in the time allotted to me, so my initial plan was to include shooting stars. Unfortunately I started to run out of time, and ultimately I was worried they would make things too busy, anyway.


I knew purple was a requirement for the ground fabric. I found a wonderful linen - thin enough to make a good cover while still hefty enough for the heavy embroidery I had in mind.
Because of the geometric nature of the design I decided to draw onto parchment paper so I could the lines exactly correct. It was, as usual, a pain to remove, and I'm not certain this time if it was the right route. It's harder to remove the paper from linen than it was from velvet or wool, where the pile helps get the paper off.

All the embroidery is silk - for the belt I used a few shades of Splendor, and the geometric portions were done using a thicker pearl thread that I got at Gulf Wars last year.
Non metal embroidery completed

Silk shading and gold work, while often found together, are not often found with German designs (that I've found. I admit I haven't looked very hard), but I thought it would look good - and would be an easy (in that I'm practiced at those methods) way to get a good looking book.

I'm very happy with how the shading came out - considering I only used three colors, I was worried it would end up too rigid looking. The belt did come out a little...non euclidean. I would change the shape of where it wraps around itself if I went back to do it again.

The biggest problem that I had with this was that the frame wasn't holding the center of the piece as tight as I would want. I had to retighten if regularly, and I still ended up with a lump in the middle of the belt, which you can see in the finished picture below.


For the goldwork I used passed thread as the buckled and the bits inside the geometric areas. I'm very happy with how the buckle came out. The gold on the end of the belt is pearl purl, slightly stretched out. I was originally planning on using normal purl or bullion for that area, but I didn't have any with quite the right color gold to match the passing thread I used. I like the effect, so I'm ok with making the last minute change.
It doesn't really show in the pictures, but the entire belt is outlined in a very thing wire twist, including inside the holes. I think this is most apparent in that the belt seems more smooth in the the final picture than with just the needle painting done.

And finally, the finished product!


Tuesday, January 5, 2016

Mod Gloves - The Embroidering

This is part 2 of the glove extravaganza. Part 1 can be found here.

The is the exciting part! To me, anyway.

The inspiration gloves were white leather, with red silk and gold thread. It looks like there could maybe be some silver in there too, but it's hard to tell whether that just because it's old or not.

I knew that Donovan wanted black gloves, preferred silver to gold, and that his outfit would be green. So I adjusted the colors to reflect that.

I started with a nice thick piece of black linen, big enough to work on both cuffs at once. I knew that if I did them one at a time then he would only ever get one glove. The large scroll frame I have was just big enough to work.

Transferring the pattern to the fabric was a project in itself. I didn't feel comfortable freehanding the pattern, and thick black fabric and light boxes don't really get along. And besides all of that, any normal pen wasn't going to show up anyway. I ended up using a combination of chalk and carbon transfer sheets to get the pattern on there, and then stitched around eeeeverything with running stitch, because the chalk was never going to stay long enough.


Then began the silk embroidery. This, at least, was nothing particularly new. I chose green instead of red to go with his outfit, and because he's a fan of the color. I also decided to have the larger motifs needle painted...mostly because I really like how needle painting looks.

I used Eterna flat silk, which is a pain to work with but so very shiny. I outlines each flower-thing with split stitch with the darker green, and the filled it in with long and short stitches. For the needle painted ones, I did last row or two in a light green, still with long and short stitch.


For the OGR and OSR symbols I decided to applique felt for the blue areas instead of trying to fill it in with stitches. This was mostly because filling in the entire circle for the OSR seemed like a bad idea, and I wanted to make sure they matched. So I cut out circles and tiger heads, two of each, and appliqued them down with tiny stitches.

Now for some goldwork.
Due to the time contraints I had, and the fact that I felt like I could have ruined this at any time, I did not splurge on new materials for the goldwork. I had some jap gold (and jap silver) in a somewhat thick size (check for the size?), and did all of the goldwork using those threads. These threads were perfectly fine for the lines - maybe a little bit too bold, and difficult for turning corners, but perfectly serviceable. Where the threads fell down was on all of the filled areas. I'm pretty sure that the original gloves used chips of check purl to do the filling, but the Japanese thread of course needed to be plunged..and plunging centimeter long bits of metallic thread is not a thing I suggest to anyone. Especially a wrapped thread that will start to fall apart.

I realized quickly that due to time and the previously mentioned corner turning problems, that doing all the little leaves the design wasn't going to work. So most of those got dropped early on.

One problem that I didn't foresee was that the thick thread absolutely could not be plunged through the dense felt I used for the badges.This was mostly a problem on the Silver Rapier badge, and resulted in a lot of creative bending and end covering. I think it worked out ok, but I will never make that particular mistake again.


I am very happy with some of the couching work I did and very unhappy with other parts. Things that looked ok on the frame got wobbly once the tension was off. A lot of the problems came from rushing - I didn't put my stitches close enough together, I didn't always secure the stitches as tightly at the ends as I should have.


Tuesday, August 25, 2015

Needle Painting

This isn't exactly SCA embroidery but goddamnit I'm proud of it, so you get to look at it.

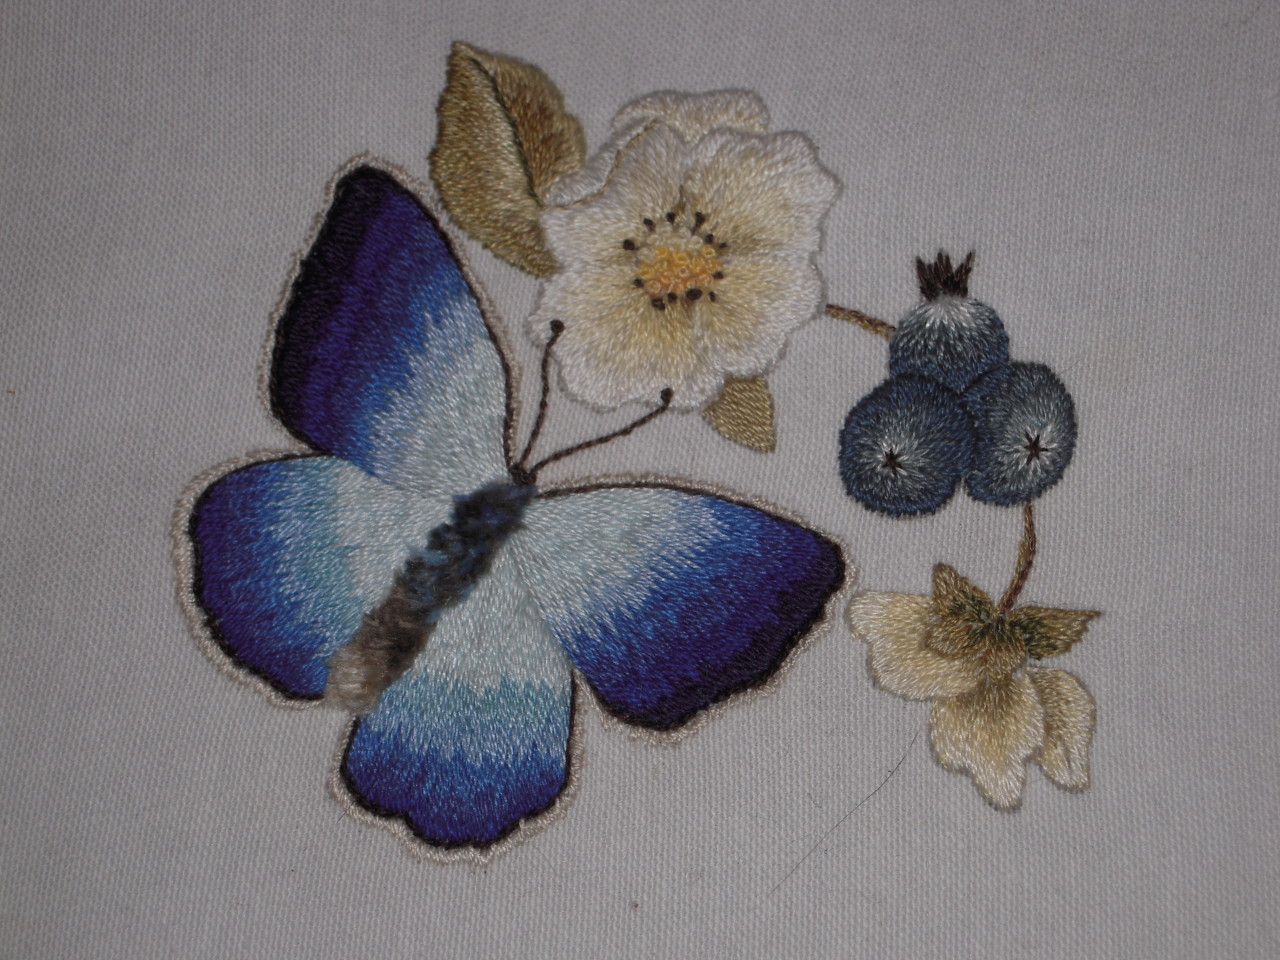
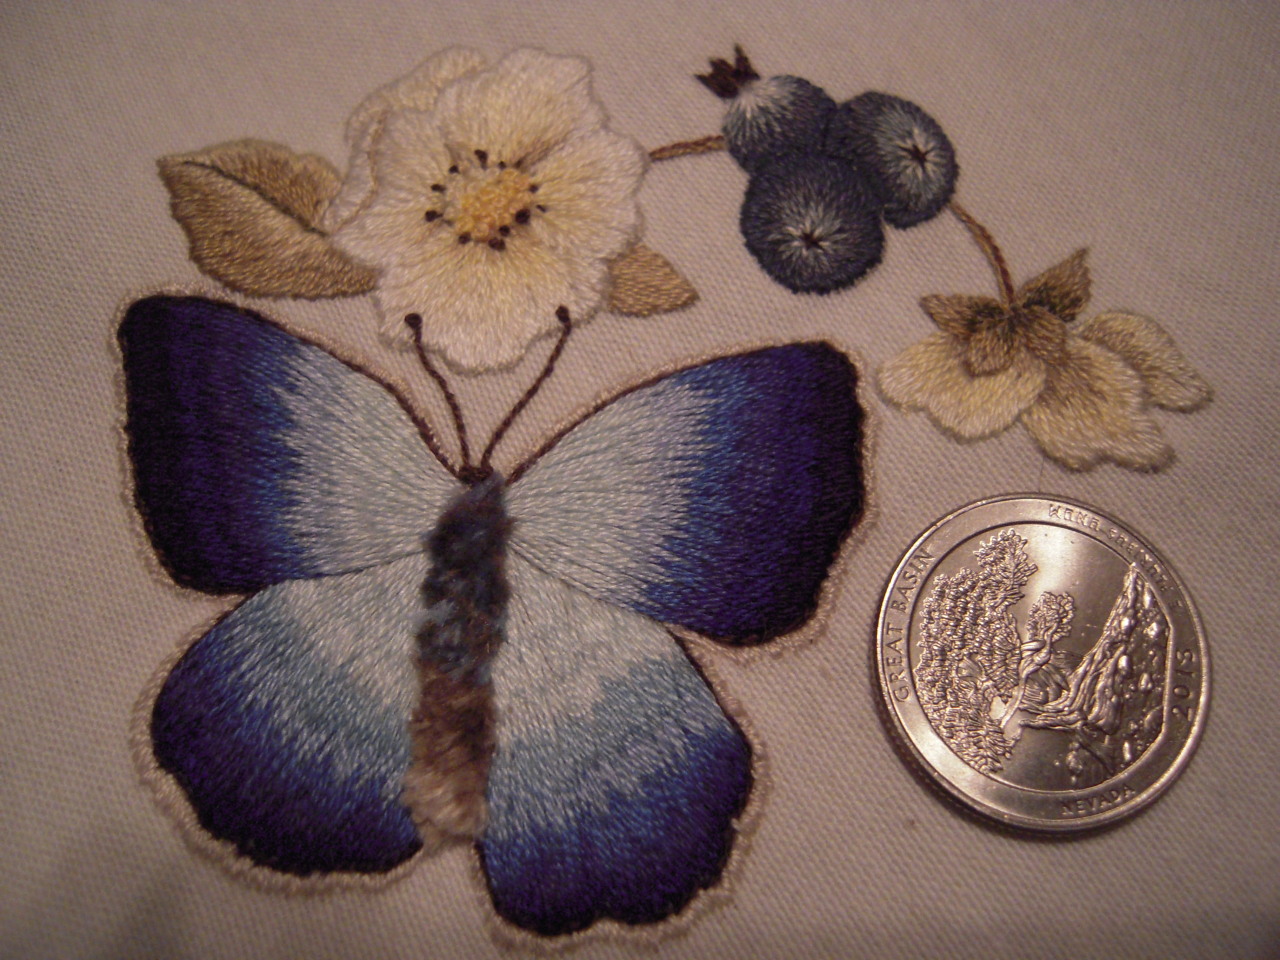
This is a kit from Trish Burr and my first foray into needle painting. Turns out I really like needle painting.


And a few months after I fiiiinally finished that, I tried needle painting sans kit and came up with this rose.

Needle painting is a common technique, but mostly it comes up in the 17th century - just a little bit too late to be properly "period" for the SCA. It also comes up in Eastern embroidery, but they have a precision that I will never have the patience for. So I will just have an ongoing search for examples that aren't quite over the line of 1600. If you happen to know of any, I would love to add them to my collection. Someday there will be period needle painting for me.