When my good friend Elaina was given her write for the Laurel, I realized that I was pretty Booked Out. I still definitely wanted to make something to celebrate her accomplishments, though. I figured she would be very supportive of me using her as an excuse to start my next real A&S project. And so!
 |
| https://collection.cooperhewitt.org/objects/18705973/ |
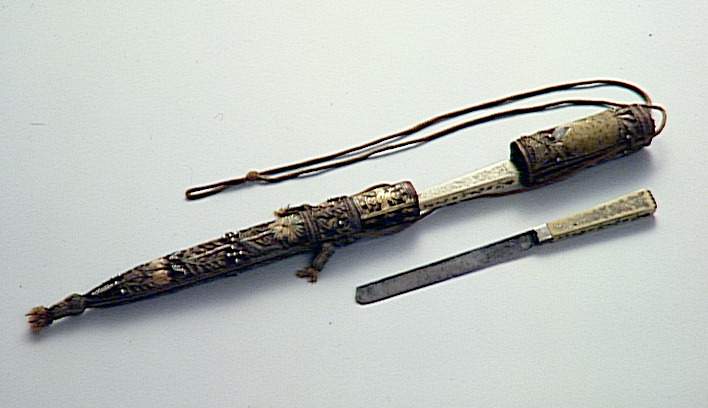
I'd been looking at the concept of Wedding Knives for some time. Pretty embroidery and sharp objects all at the same time? Sign me up! It was an Elizabethan era tradition to give a newly married couple (or seemingly, just the new wife) a pair of table knives in a fancy case.
Also during this period people had cutlery cases that were similarly decorative.
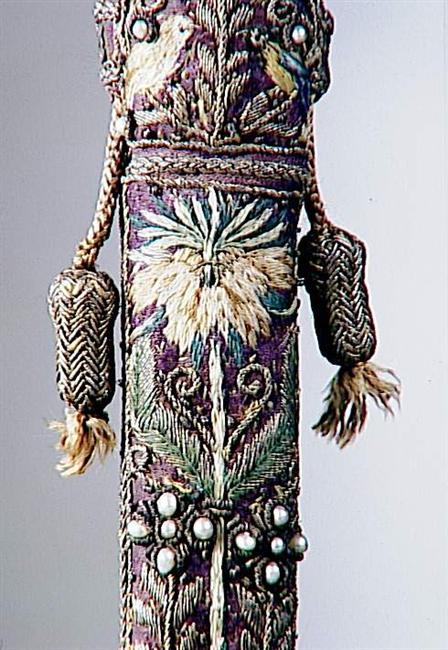
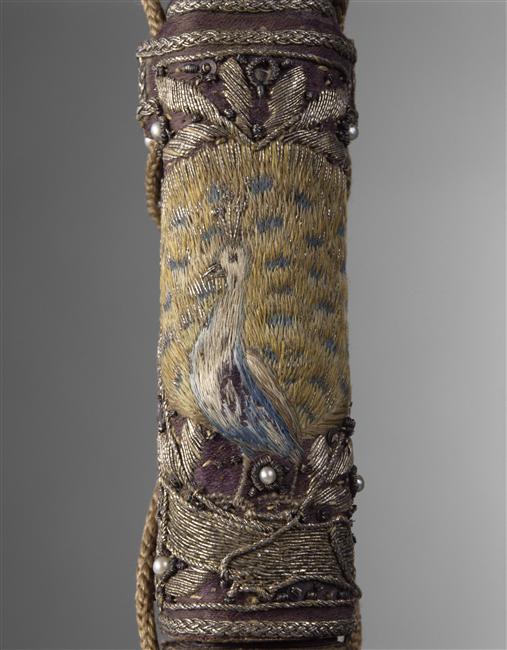
Elaina had decreed that she wanted her vigil to be based on a 17th century Italian wedding reception. It just so happened that while I mostly have evidence of the English doing this particular tradition, I also have one knife sheath that is from Venice. And it also just so happened that is was my favorite.
 |
| https://www.photo.rmn.fr/archive/99-016973-2C6NU0X7YT91.html |
Just look at the gorgeous silk shading and gold work throughout. It's like it was made for me to make.
The pictures don't have closeups of every part of the sheath, so I've done some guesswork and some adjustments, but I tried to stay true to the original.
One of the motifs on the cover is a pelican in its piety (which I'll definitely have to remember for a future pelican) so I've replaced that with a laurel wreath.
Now, the hardest part of this for me was how to go about getting a sheath to cover. And knives.
I decided for this timeline to cheat on those particular aspects, and instead create something that might get some more day to day use. I took a large wooden needlecase and used wood epoxy to expand it into a sheath shape, and then used that as the base for the embroidery.
To the right you can see the original needlecase, the expanded sheath, as well as the pattern I created. The molded sheath was far from symmetrical, so I draped some cheap cotton over it to make sure everything would fit ok. (Here's hoping that actually works in the end...)
The next step was to get the actual pattern. I sketched out the base pattern without using the weird shapes made from my drape first (on the right) and then I transferred that to the correct shape. I the traced it all onto some thin linen.
And then, because that linen would be backing the silk, I flipped the linen over and traced again, in order to get the design facing the right way. Now, with the linen basted to the silk, I could use the lines on the linen to determine my stitches, and hopefully never have to mar the silk at all. Unfortunately I did the final basting backwards and things are facing the other way anyway, but oh well!
All in all, I think I drew this pattern 5 times, though. So glad it's small.